
Event Overview
Dates & Location
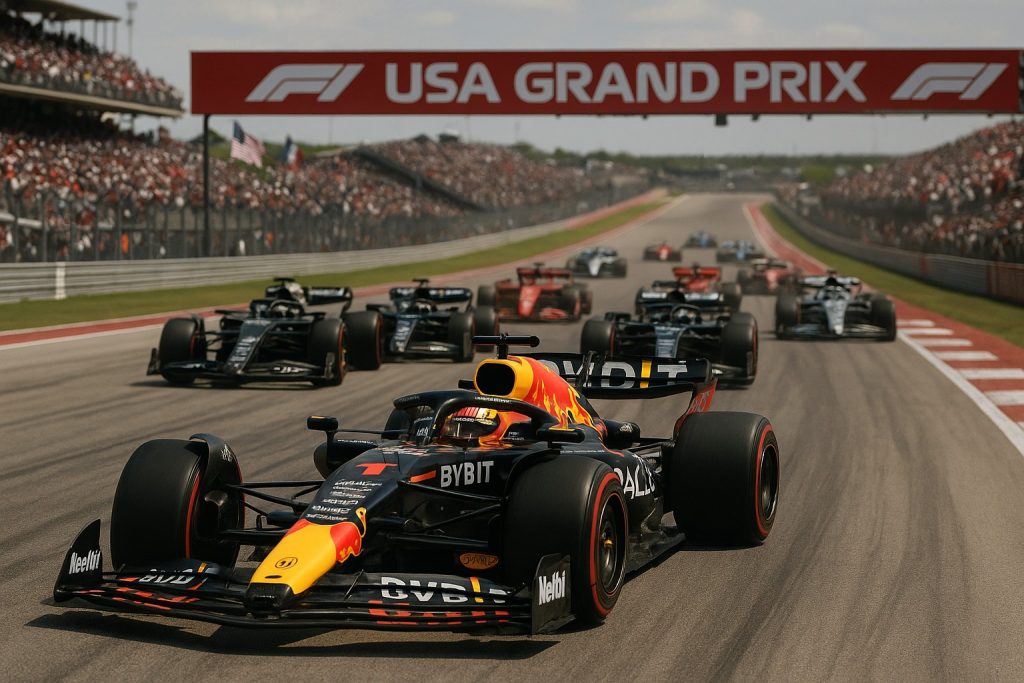
✅ Upcoming Event: Formula 1 United States Grand Prix 2025
Date: October 17 – 19, 2025
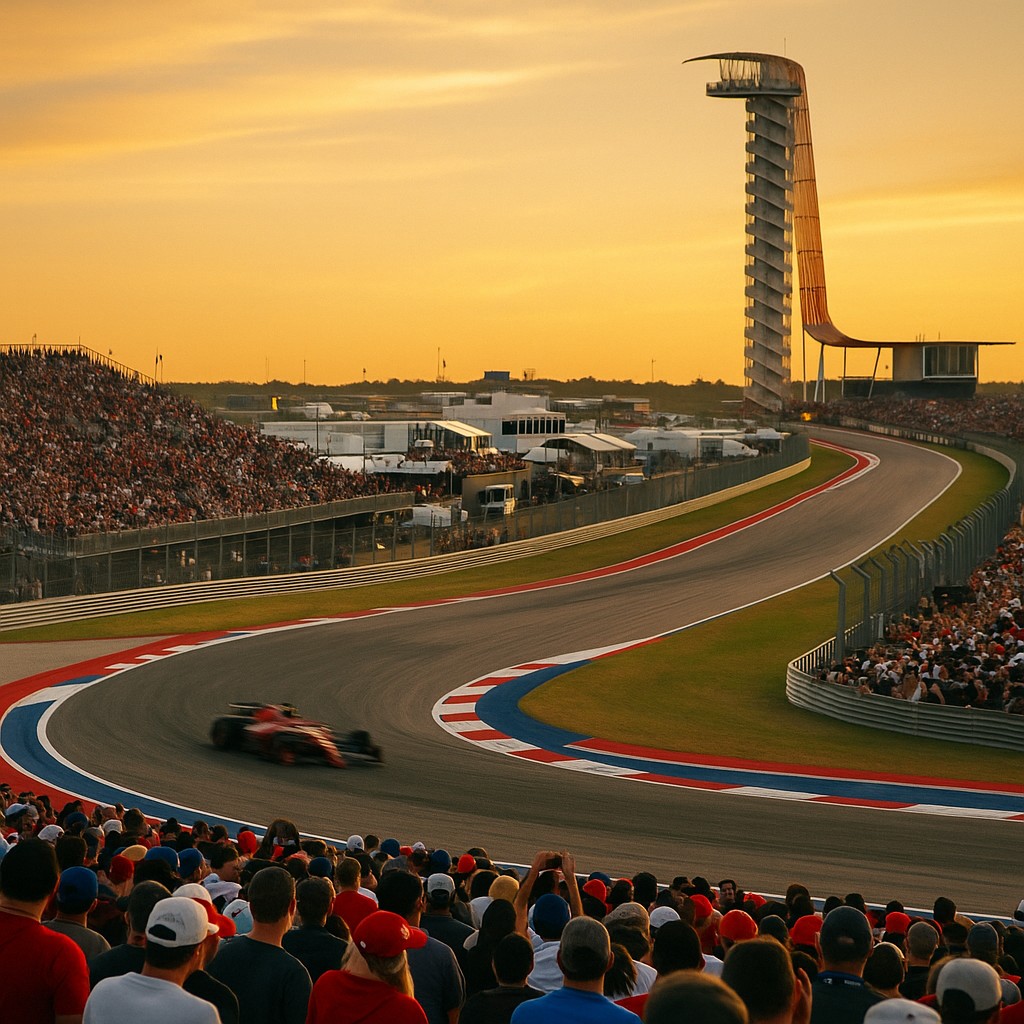
Venue: Circuit of the Americas (COTA), Austin, Texas, USA
Round: 20 of 24 in the 2025 F1 World Championship
COTA remains one of the most technically demanding circuits in North America, combining elevation changes, long straights, and high-speed direction shifts. The track’s unique blend of corners modeled after Silverstone, Suzuka, and Hockenheim requires aerodynamic efficiency and mechanical balance.
DRS Zones: 2 | Top Speed: ≈ 330 km/h | Lap Record: 1:36.169 (Lewis Hamilton, 2019)
Circuit Profile
The layout starts with a steep uphill run into Turn 1, creating heavy braking and overtaking chances. Sector 1 features rapid left-right transitions requiring agile front-end response and stable rear grip. Sector 2 emphasizes traction and braking into the long back straight, while Sector 3 tests tyre wear through a series of medium-speed corners that expose balance weaknesses.
- Sector 1: High-load, high-aero efficiency crucial (Turns 3–9).
- Sector 2: Power-sensitive; ERS deployment management key.
- Sector 3: Mechanical grip and tyre longevity dominate performance.
Technical Landscape
Aero Updates & Package Trends
COTA rewards stable high-speed rotation and robust rear stability through the Esses. Teams bring medium–high downforce kits with trimmed beam wings to cap drag on the back straight.
- Reprofiled flap tips to delay separation in yaw.
- Larger inboard camber to quicken response in T3-T6.
- Small Gurney options for balance trims (+0.5 to +1.0% aero balance).
- Beam-wing stack: upper trimmed, lower neutral to tune downforce/drag.
- Reinforced floor fences for vortex robustness over bumps.
- Diffuser edge flicks for stability in long loaded corners.
Power Units & Cooling Strategy
The long T11–T12 straight makes deployment mapping critical. Teams target full MGU-H harvest in S3 and partial MGU-K release out of T11. Cooling openings are set conservatively due to dirty-air running in S1 trains.
| System | Austin Setup Notes |
|---|---|
| ICE/TC | Shorter gear ratio spread for uphill T1; protect knock at high ambient. |
| ERS (MGU-K/H) | Harvest S3, deploy out of T11 and T20; avoid clipping end-straight. |
| Cooling | +1 step louvre opening; brake ducts medium-large for repeated 5G stops. |
| Energy Mgmt | Lift-and-coast 50–80 m in traffic to manage temps and fuel deltas. |
Tyre Choice & Setup Direction
COTA punishes fronts in the Esses and rears in S3 traction zones. Baseline tends toward neutral-to-mild understeer to protect the rear axle over race distance.
- Front camber aggressive within regs to hold S1 load.
- Rear anti-roll softer for traction over bumps in S3.
- Ride-height +1–2 mm vs low-drag spec to avoid floor strikes.
- Differential: higher preload in quali, back it off for race.
- Front-left thermal limit in long S-sequences.
- Rear-right wear limit exiting T11/T12 braking-traction cycle.
- Stagger pressures: +0.5 psi fronts in quali, equalize for race.
- Undercut viable with warm-up friendly compounds and clean air.
Key Data Points & Simulations
Performance modelling for COTA emphasizes combined-load balance and straight-line efficiency. Simulated data from the 2024 race and early 2025 telemetry comparisons outline how teams are expected to trade off drag versus corner speed this year.
| Sector | Average Time (s) | Performance Driver |
|---|---|---|
| Sector 1 | 28.1 | Front grip, aero balance |
| Sector 2 | 36.3 | Power unit, drag |
| Sector 3 | 33.9 | Mechanical grip, tyre wear |
- Aerodynamic efficiency – 38%
- Power unit deployment – 22%
- Tyre management – 17%
- Ride height and suspension – 13%
- Driver input & consistency – 10%
Expected qualifying pole: 1:33.7–1:34.0 (soft compound).
Race pace differential: +1.8s on mediums, +3.2s on hards.
ERS clipping occurs ~80 m before T12 in DRS trains.
| Team | Top Speed (km/h) | Drag Coefficient |
|---|---|---|
| Red Bull Racing RB21 | 328 | 0.91 |
| Ferrari SF-25 | 326 | 0.93 |
| Mercedes W15E | 324 | 0.94 |
| McLaren MCL39 | 322 | 0.95 |
Data derived from 2024–2025 CFD correlation models and team simulation trends. Actual figures may vary based on ambient conditions and FIA setup directives.
Teams & Drivers to Watch
Red Bull Racing
High aero efficiency and strong rear stability through S1. ERS deployment mapping suits long T11–T12 straight.
- Strength: Rotation in high-speed direction changes.
- Risk: Tyre thermal spike in S3 if rear ride-height too low.
Ferrari
Strong traction out of slow corners; improved brake stability over bumps aids T1 and T12 dives.
- Strength: Launch and low-speed rotation.
- Risk: Drag sensitivity may cap DRS gains.
Mercedes
Stable platform on kerbs; good tyre longevity in S3 when rear ARB is softened.
- Strength: Long-run consistency.
- Risk: Slow warm-up on harder compounds.
McLaren
Agile front end ideal for the Esses; improved floor robustness reduces bouncing at high yaw.
- Strength: S1 peak pace.
- Risk: Rear degradation late in stints.
| Team | S1 Pace | Straight-line | Tyre Deg | Pit Ops |
|---|---|---|---|---|
| Red Bull | ★★★★★ | ★★★★★ | ★★★☆☆ | ★★★★★ |
| Ferrari | ★★★★☆ | ★★★★☆ | ★★★☆☆ | ★★★★☆ |
| Mercedes | ★★★☆☆ | ★★★★☆ | ★★★★☆ | ★★★★☆ |
| McLaren | ★★★★★ | ★★★☆☆ | ★★★☆☆ | ★★★★☆ |
Driver Focus: Max Verstappen
Excels in high-speed yaw stability and ERS timing. Key advantage through T3–T9 rhythm and T11 exits.
Driver Focus: Charles Leclerc
Late braker with precise rotation into apex. Watch for aggressive undercut windows on Medium → Hard.
Driver Focus: Lewis Hamilton
Strong tyre life management in S3. Potential to extend first stint and gain track position.
Driver Focus: Lando Norris
High S1 pace with clean inputs. Needs rear protection late race; two-stop strategy can maximize pace.
Strategy Scenarios
COTA strategy hinges on tyre warm-up, S1 traffic trains, and undercut power into T12. Pit delta averages ~21.5–22.5s (green conditions). Safety Cars are frequent around T1/T11 incidents.
Baseline Plans
- One-stop (M→H): PIT L22–30. Requires clean air and low rear-deg in S3.
- Two-stop (M→H→M): PIT L17–20 & L39–43. Maximizes S1 pace, safer tyre temps.
- Alt (H→M one-stop): Start on Hard for long first stint, attack with Mediums late.
Undercut vs Overcut
- Undercut gain: 0.9–1.3s on fresh tyre if out-lap clean.
- Overcut: viable only with tyre-friendly cars and traffic ahead pitting into trains.
- Box back-to-back risks double-stack loss of 1.5–2.5s if pit boxes congest.
Start Phase & Fuel
- Launch: Uphill to T1 reduces lockup risk; inside line defends well but compromises T2 entry speed.
- Fuel: Marginal lift-and-coast 50–80 m in S2 reduces temps and saves 0.05–0.07 kg/lap.
- Brake mgmt: Medium-large ducts recommended; avoid glazing on formation lap with varied pressure points.
Safety Car / VSC Playbook
| Lap Window | Action | Rationale |
|---|---|---|
| Laps 1–8 | Stay out unless severe tyre issues | Protect track position; compounds still in warm-up window |
| Laps 12–20 | Pit for Hards | Convert to one-stop, jump traffic trains |
| Laps 30–40 | Pit for Mediums | Attack window to the flag; minimize deg exposure |
Weather & Track Evolution
Baseline Forecast Assumptions
- Ambient: 22–28 °C daytime, 18–21 °C evening
- Track temp: 28–40 °C depending on cloud cover
- Wind: 8–16 km/h S–SE, gusts up to 22 km/h on back straight
- Rain: Low probability; convective cells possible late afternoon
- Humidity: 45–65% affecting engine cooling efficiency
Operational Implications
- Higher track temps elevate rear thermal deg in S3
- Crosswinds reduce stability through Esses; front flap trims of −0.25° may help
- Cloud cover narrows out-lap warm-up window for Hards
- Humidity + tailwind lowers top speed delta; adjust ERS release timing
Wind Map Notes
| Corner | Wind Effect | Setup/Driving Cue |
|---|---|---|
| T1 (uphill hairpin) | Headwind stabilizes braking, increases rotation margin | Deeper brake point possible; watch rear locking |
| Esses (T3–T9) | Crosswind unsettles rear at yaw | Soften rear ARB 1 click; flatter steering inputs |
| T11 exit → T12 | Tailwind reduces braking stability at T12 | Brake bias +0.2–0.4% forward; earlier ERS deploy |
| T19–T20 | Gusts push wide mid-corner | Short shift to protect rears; gentle throttle ramp |
COTA Historical Context
Since its F1 debut in 2012, Austin has rewarded cars with high-speed rotation stability and efficient drag management. The uphill launch to Turn 1 shapes opening-lap dynamics, while the Esses expose front-end responsiveness and platform control.
Recurring Technical Themes
- Medium–high downforce with trimmed beam wing to manage the long back straight.
- Front-tyre thermal sensitivity through prolonged S1 load cycles.
- Rear-axle degradation late in stints across S3 traction zones.
- Ride-height compromise to avoid floor strikes over bumps and kerbs.
- Brake cooling margins for repeated heavy stops into T1 and T12.
Racecraft & Strategy Patterns
- DRS trains limit overtakes; undercut potency rises with clean out-laps.
- Safety Car/VSC windows can flip one-stop to two-stop strategies.
- Strong pit execution correlates with net gains into T12 merge zone.
- Wind shifts meaningfully alter balance in the Esses and T11 braking.
| Era | Car Traits That Succeeded | Operational Edge |
|---|---|---|
| 2012–2016 | High aero efficiency, strong kerb compliance | Quali track position + robust traction |
| 2017–2021 | Rear stability at high yaw, brake consistency | Undercut leverage into T12, fast stops |
| 2022–2024 (ground-effect) | Floor robustness over bumps, efficient DRS gains | Tyre temp control in S3, clean-air management |
Tech Outlook & Predictions
Performance Thesis
- Pole Pace: 1:33.7–1:34.0 on Soft; S1 gains outweigh drag trims if ride-height control is stable over bumps.
- Race Shape: Two-stop most resilient (M–H–M or M–M–H). One-stop viable only for tyre-kind packages.
- Overtaking: DRS trains restrict moves; undercut potency high with clear out-lap into T12.
- Degradation: Rear thermal deg the decider; S3 balance dictates final-stint pace spread.
Key Win Conditions
- Stable aero platform through the Esses at high yaw.
- Strong ERS deployment out of T11 without end-straight clipping.
- Rear-axle preservation in S3 while defending the undercut at T12.
- Clean pit windows avoiding double-stack time loss.
Risk Matrix
| Risk | Impact | Mitigation |
|---|---|---|
| Rear thermal spike (S3) | Lap-time fade +0.5–0.8s | Softer rear ARB, diff preload down, earlier stop |
| ERS clipping in DRS train | Lost overtake, top-speed drop | Re-time deploy before T11, short-shift on exit |
| Pit lane congestion | +1.5–2.5s net loss | Offset pit windows, avoid double-stack |
| Crosswind in Esses | Rear instability, track limits | Rear flap trim, gentler steering ramps |
Projected Competitive Order
| Team | Quali Pace | Race Pace | Tyre Deg |
|---|---|---|---|
| Red Bull | ★★★★★ | ★★★★★ | ★★★☆☆ |
| Ferrari | ★★★★☆ | ★★★★☆ | ★★★☆☆ |
| Mercedes | ★★★☆☆ | ★★★★☆ | ★★★★☆ |
| McLaren | ★★★★☆ | ★★★☆☆ | ★★★☆☆ |
Scale: ★★★★★ best-in-class.
- Pole decided in S1 execution; front-limited cars fade in final sector.
- Two-stop wins unless ambient <= 24 °C and rear deg remains low.
- Undercut at T12 creates most position changes; out-lap tyre prep critical.
- Safety Car around Laps 15–35 likely to split strategies.
- High straight-line packages gain in quali but concede race tyre life.
FAQ: United States Grand Prix 2025
Q: When is the US Grand Prix 2025?
A: October 17–19, 2025. Race on Sunday at Circuit of the Americas, Austin, Texas.
Q: Where is the race held?
A: Circuit of the Americas (COTA), 5.513 km per lap, 56 laps, ~308.4 km total.
Q: What is the weekend format?
A: Standard format: FP1–FP3, Qualifying on Saturday, Grand Prix on Sunday. If F1 confirms a Sprint, the schedule will update accordingly.
Q: How many DRS zones are there?
A: Two DRS zones are planned, including the long back straight (T11→T12).
Q: Which tyre compounds will Pirelli bring?
A: Compounds to be confirmed by Pirelli. Expect a mid-range selection similar to recent COTA events.
Q: How can I watch the US GP?
A: Check regional broadcasters or F1TV Pro where available. Coverage varies by country.
Q: What are the key overtaking spots?
A: Turn 1 uphill hairpin and Turn 12 after the back straight are prime passing zones.
Q: What’s the pit lane time loss?
A: Approximately 21.5–22.5 seconds under green conditions, excluding tyre warm-up effects.